


How To Start
Mbanq provides a free-to-use evaluation environment where everyone is free to explore the Mbanq Cloud functionalities upon the successful registration at Mbanq Console
Step 1: Create your banking instance
Upon successful registration, the first thing you have to do is to roll out your own core-banking instace.
It's fairly easy to do in 2 steps:
- Click on the big round ➕ button
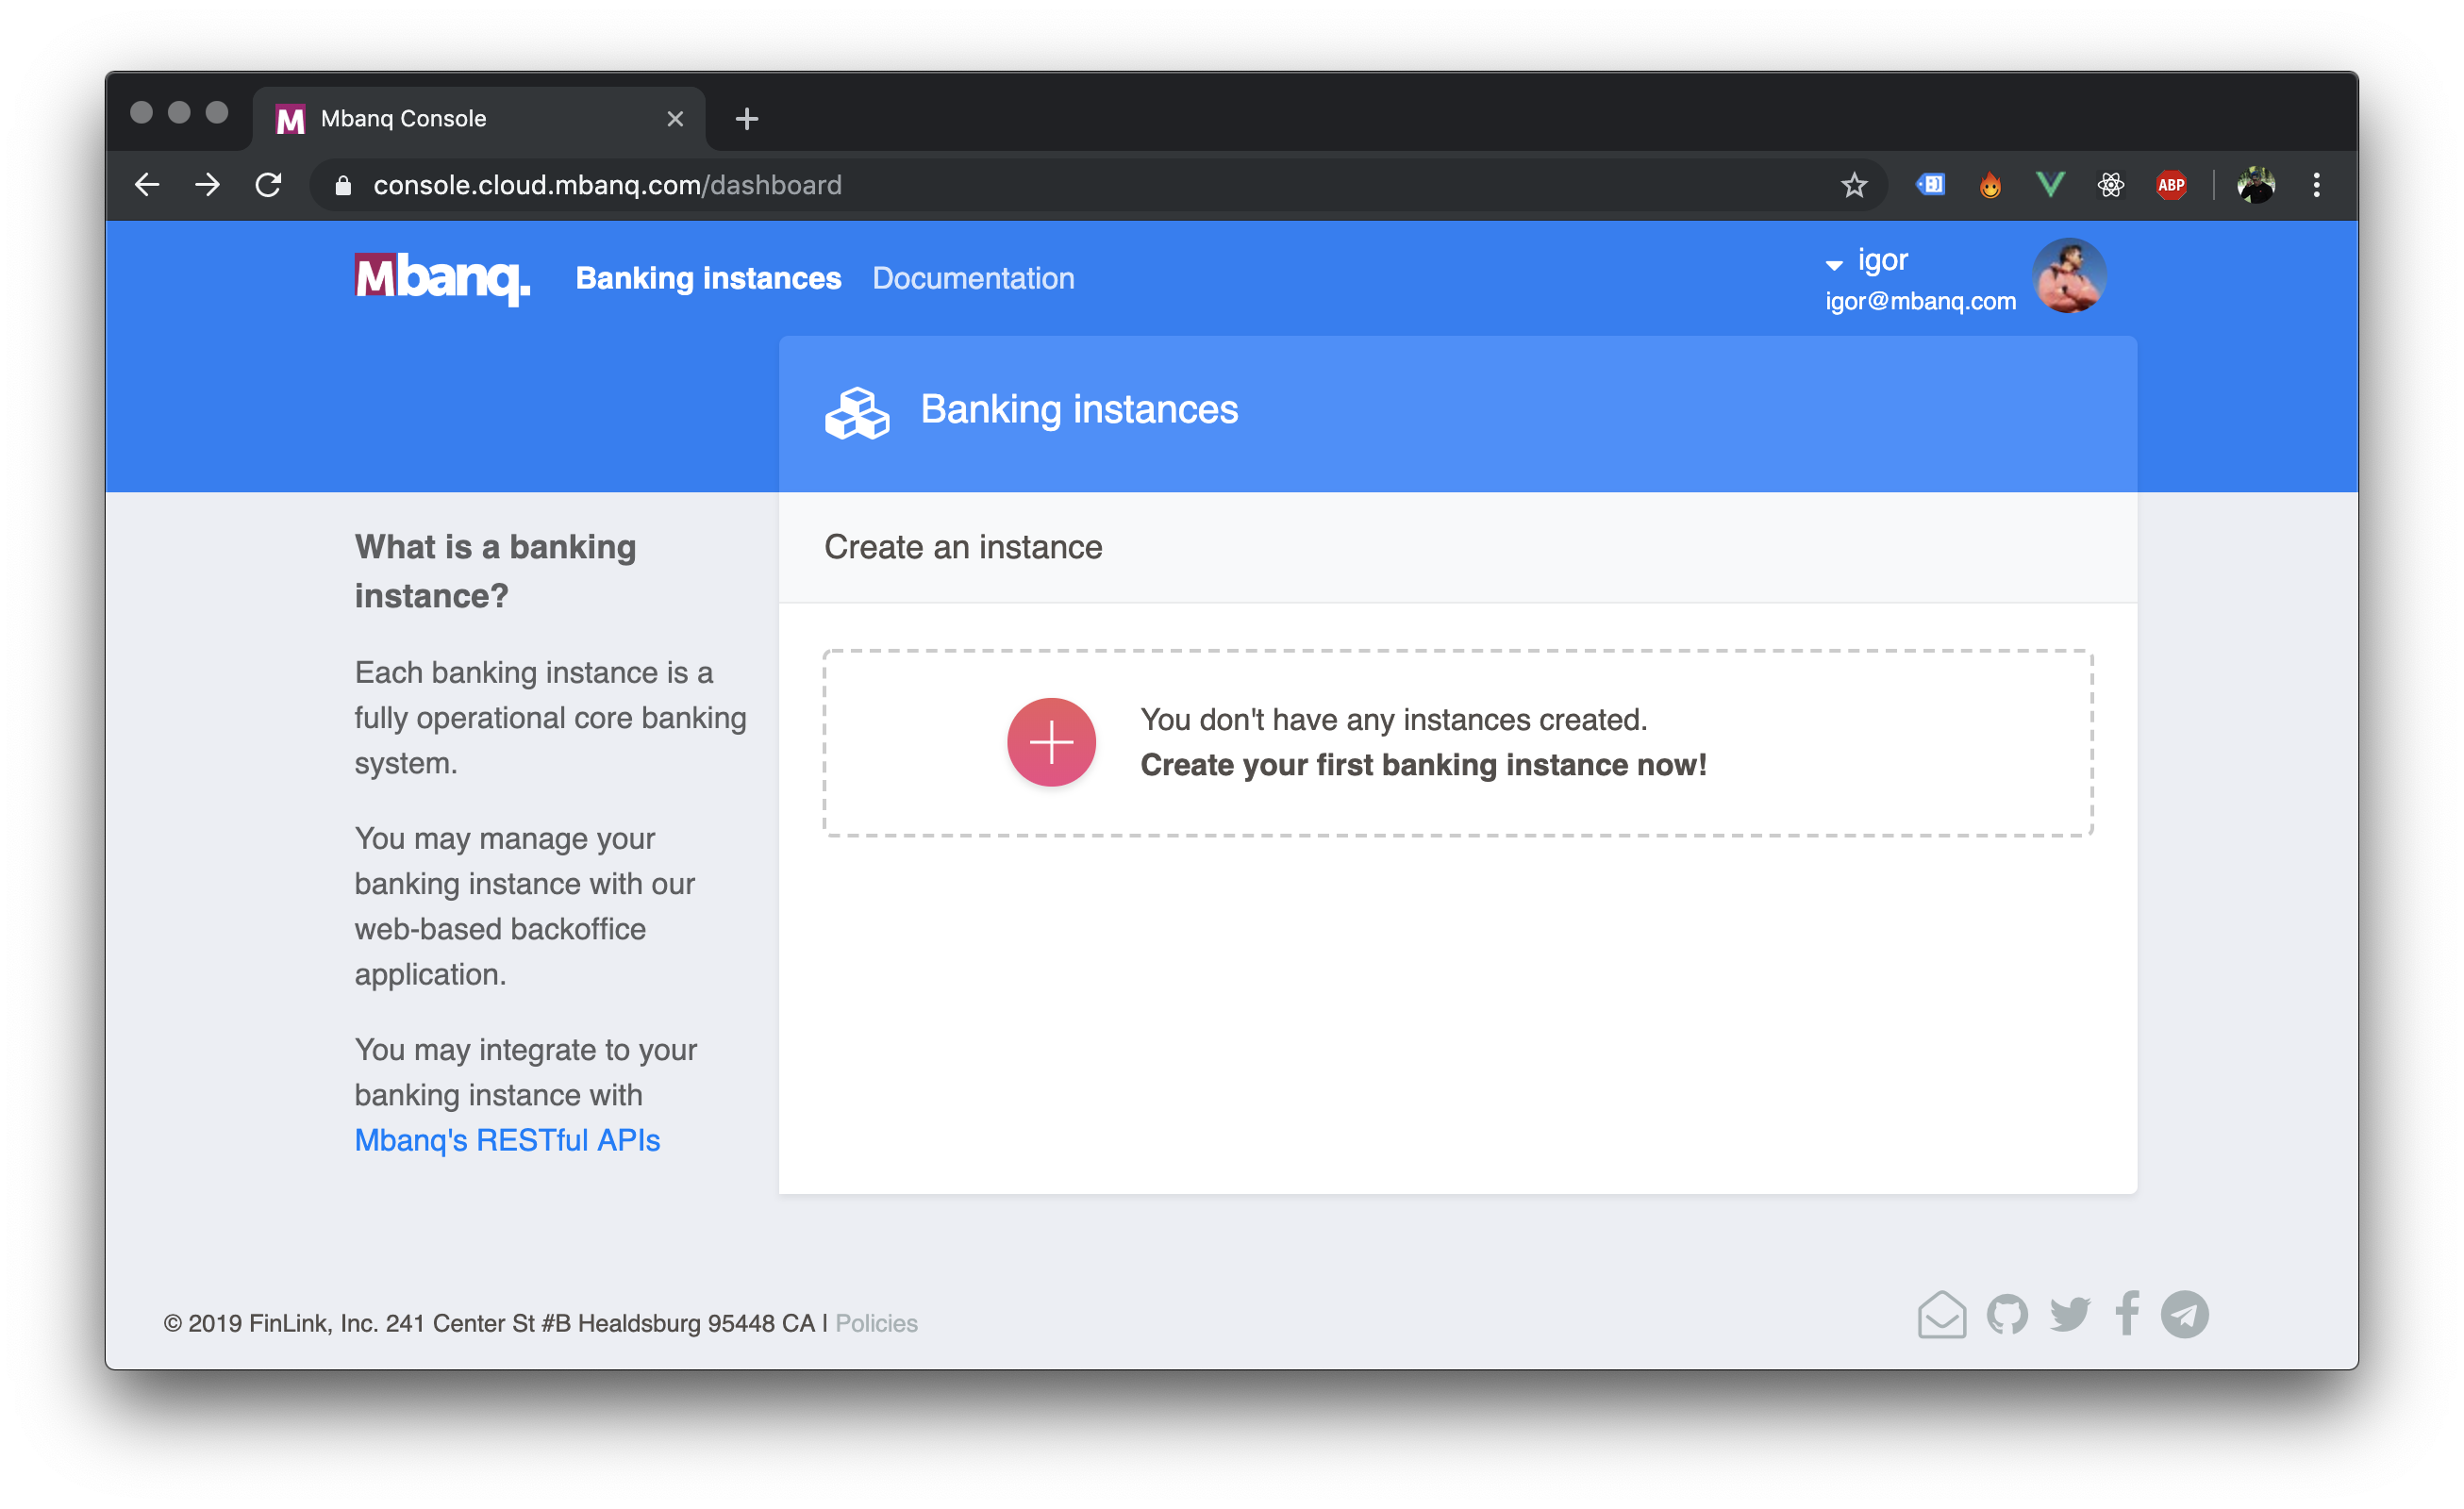
- And fill out the form
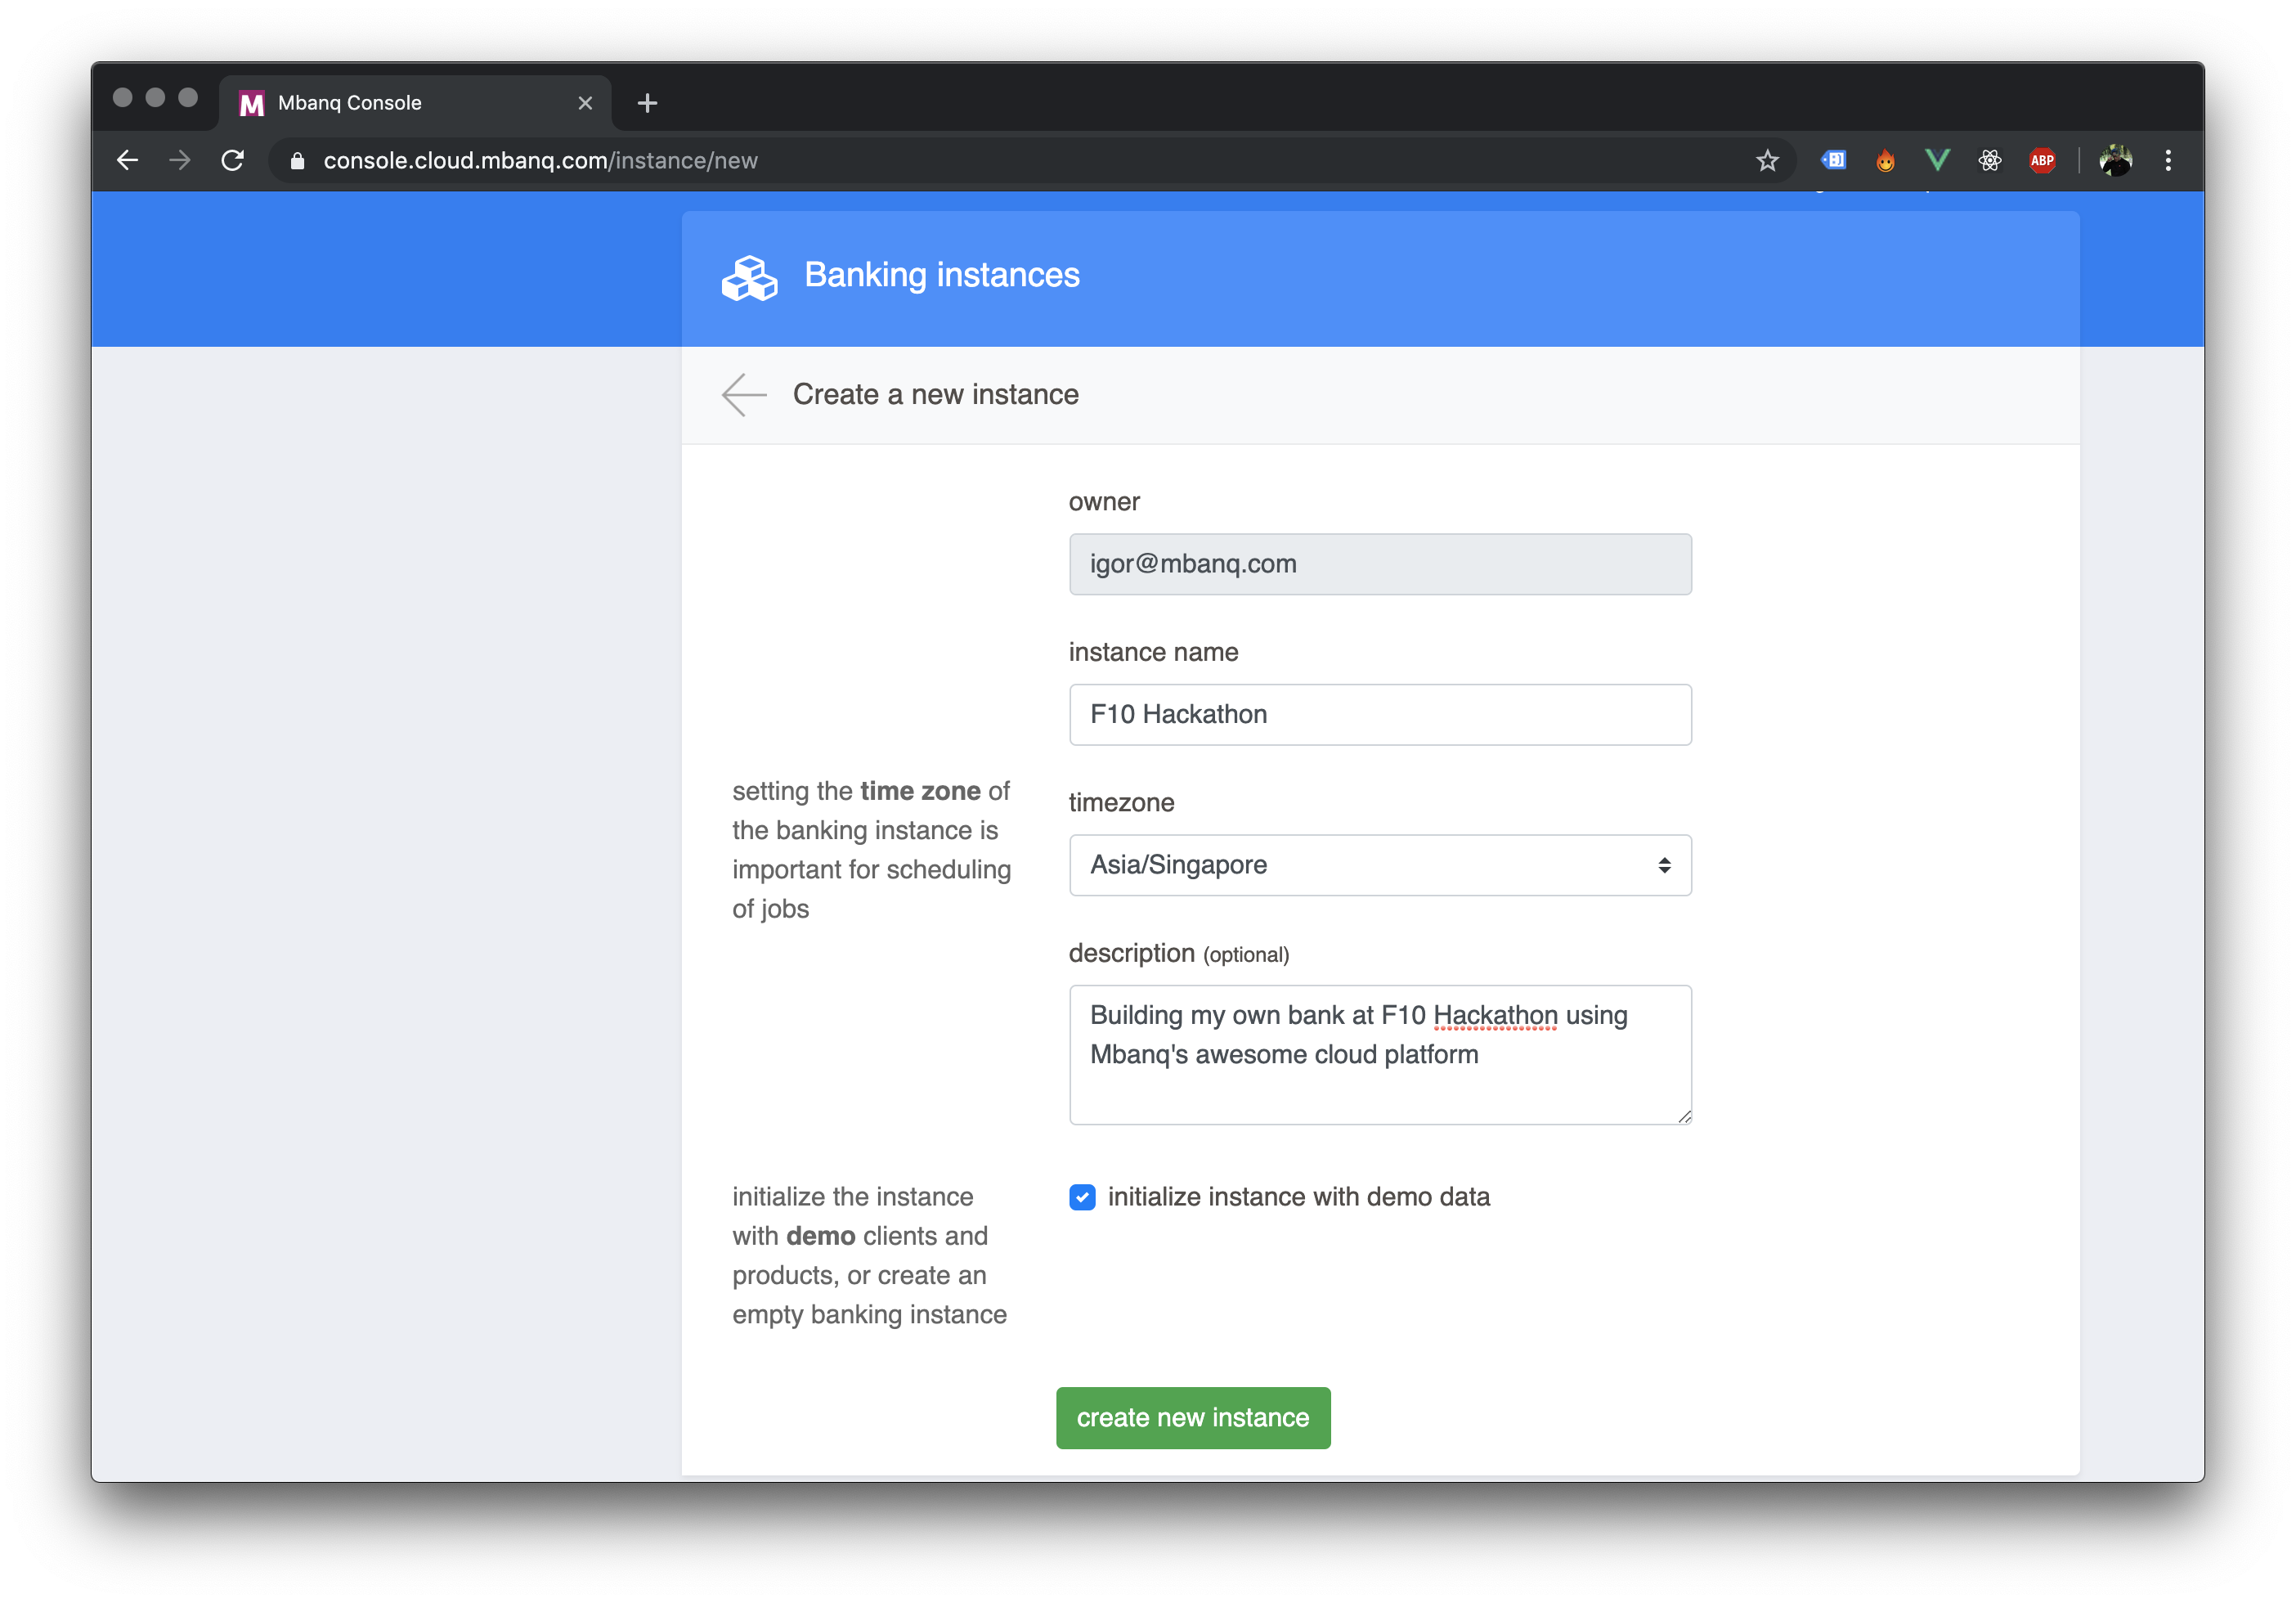
VERY IMPORTANT: don't uncheck the
initialize instance with demo data
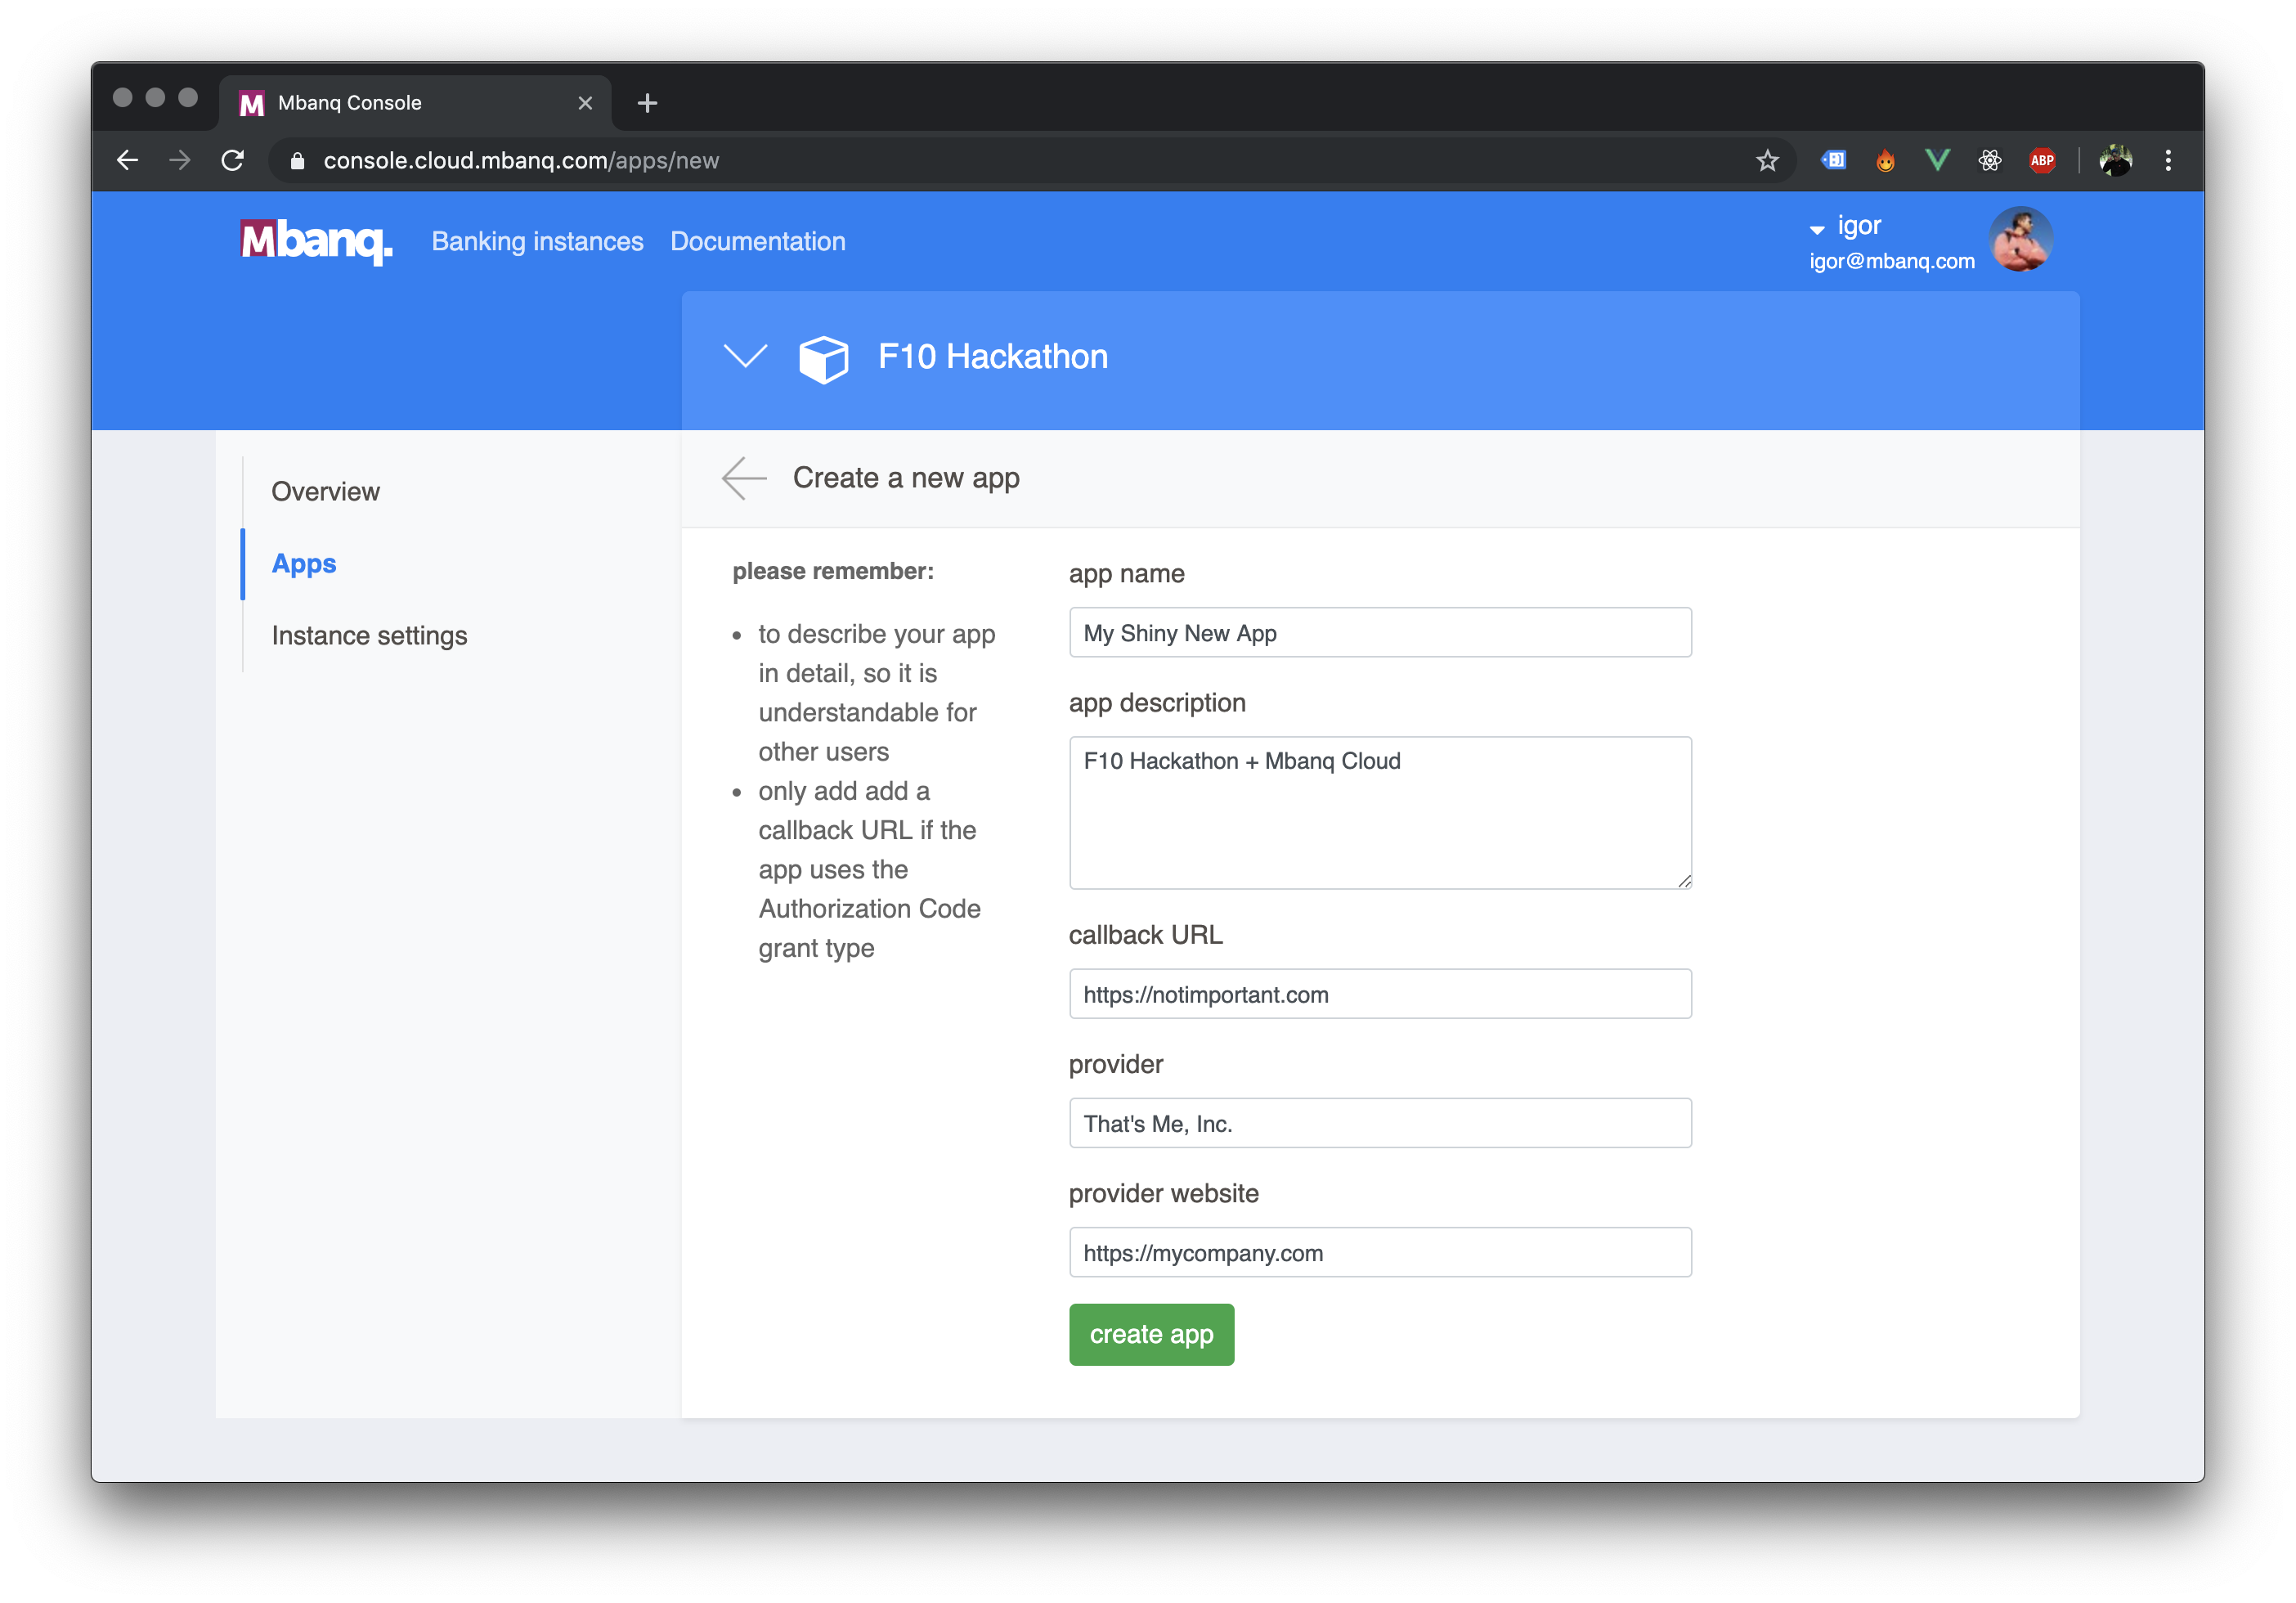
Step 2: Create your App for API access
Now the only step you have to take is to create your App for the API access.
Again follow this very easy 2 step process:
- On your just created Banking Instance screen - click on the
Apps, and then on the big round ➕ button
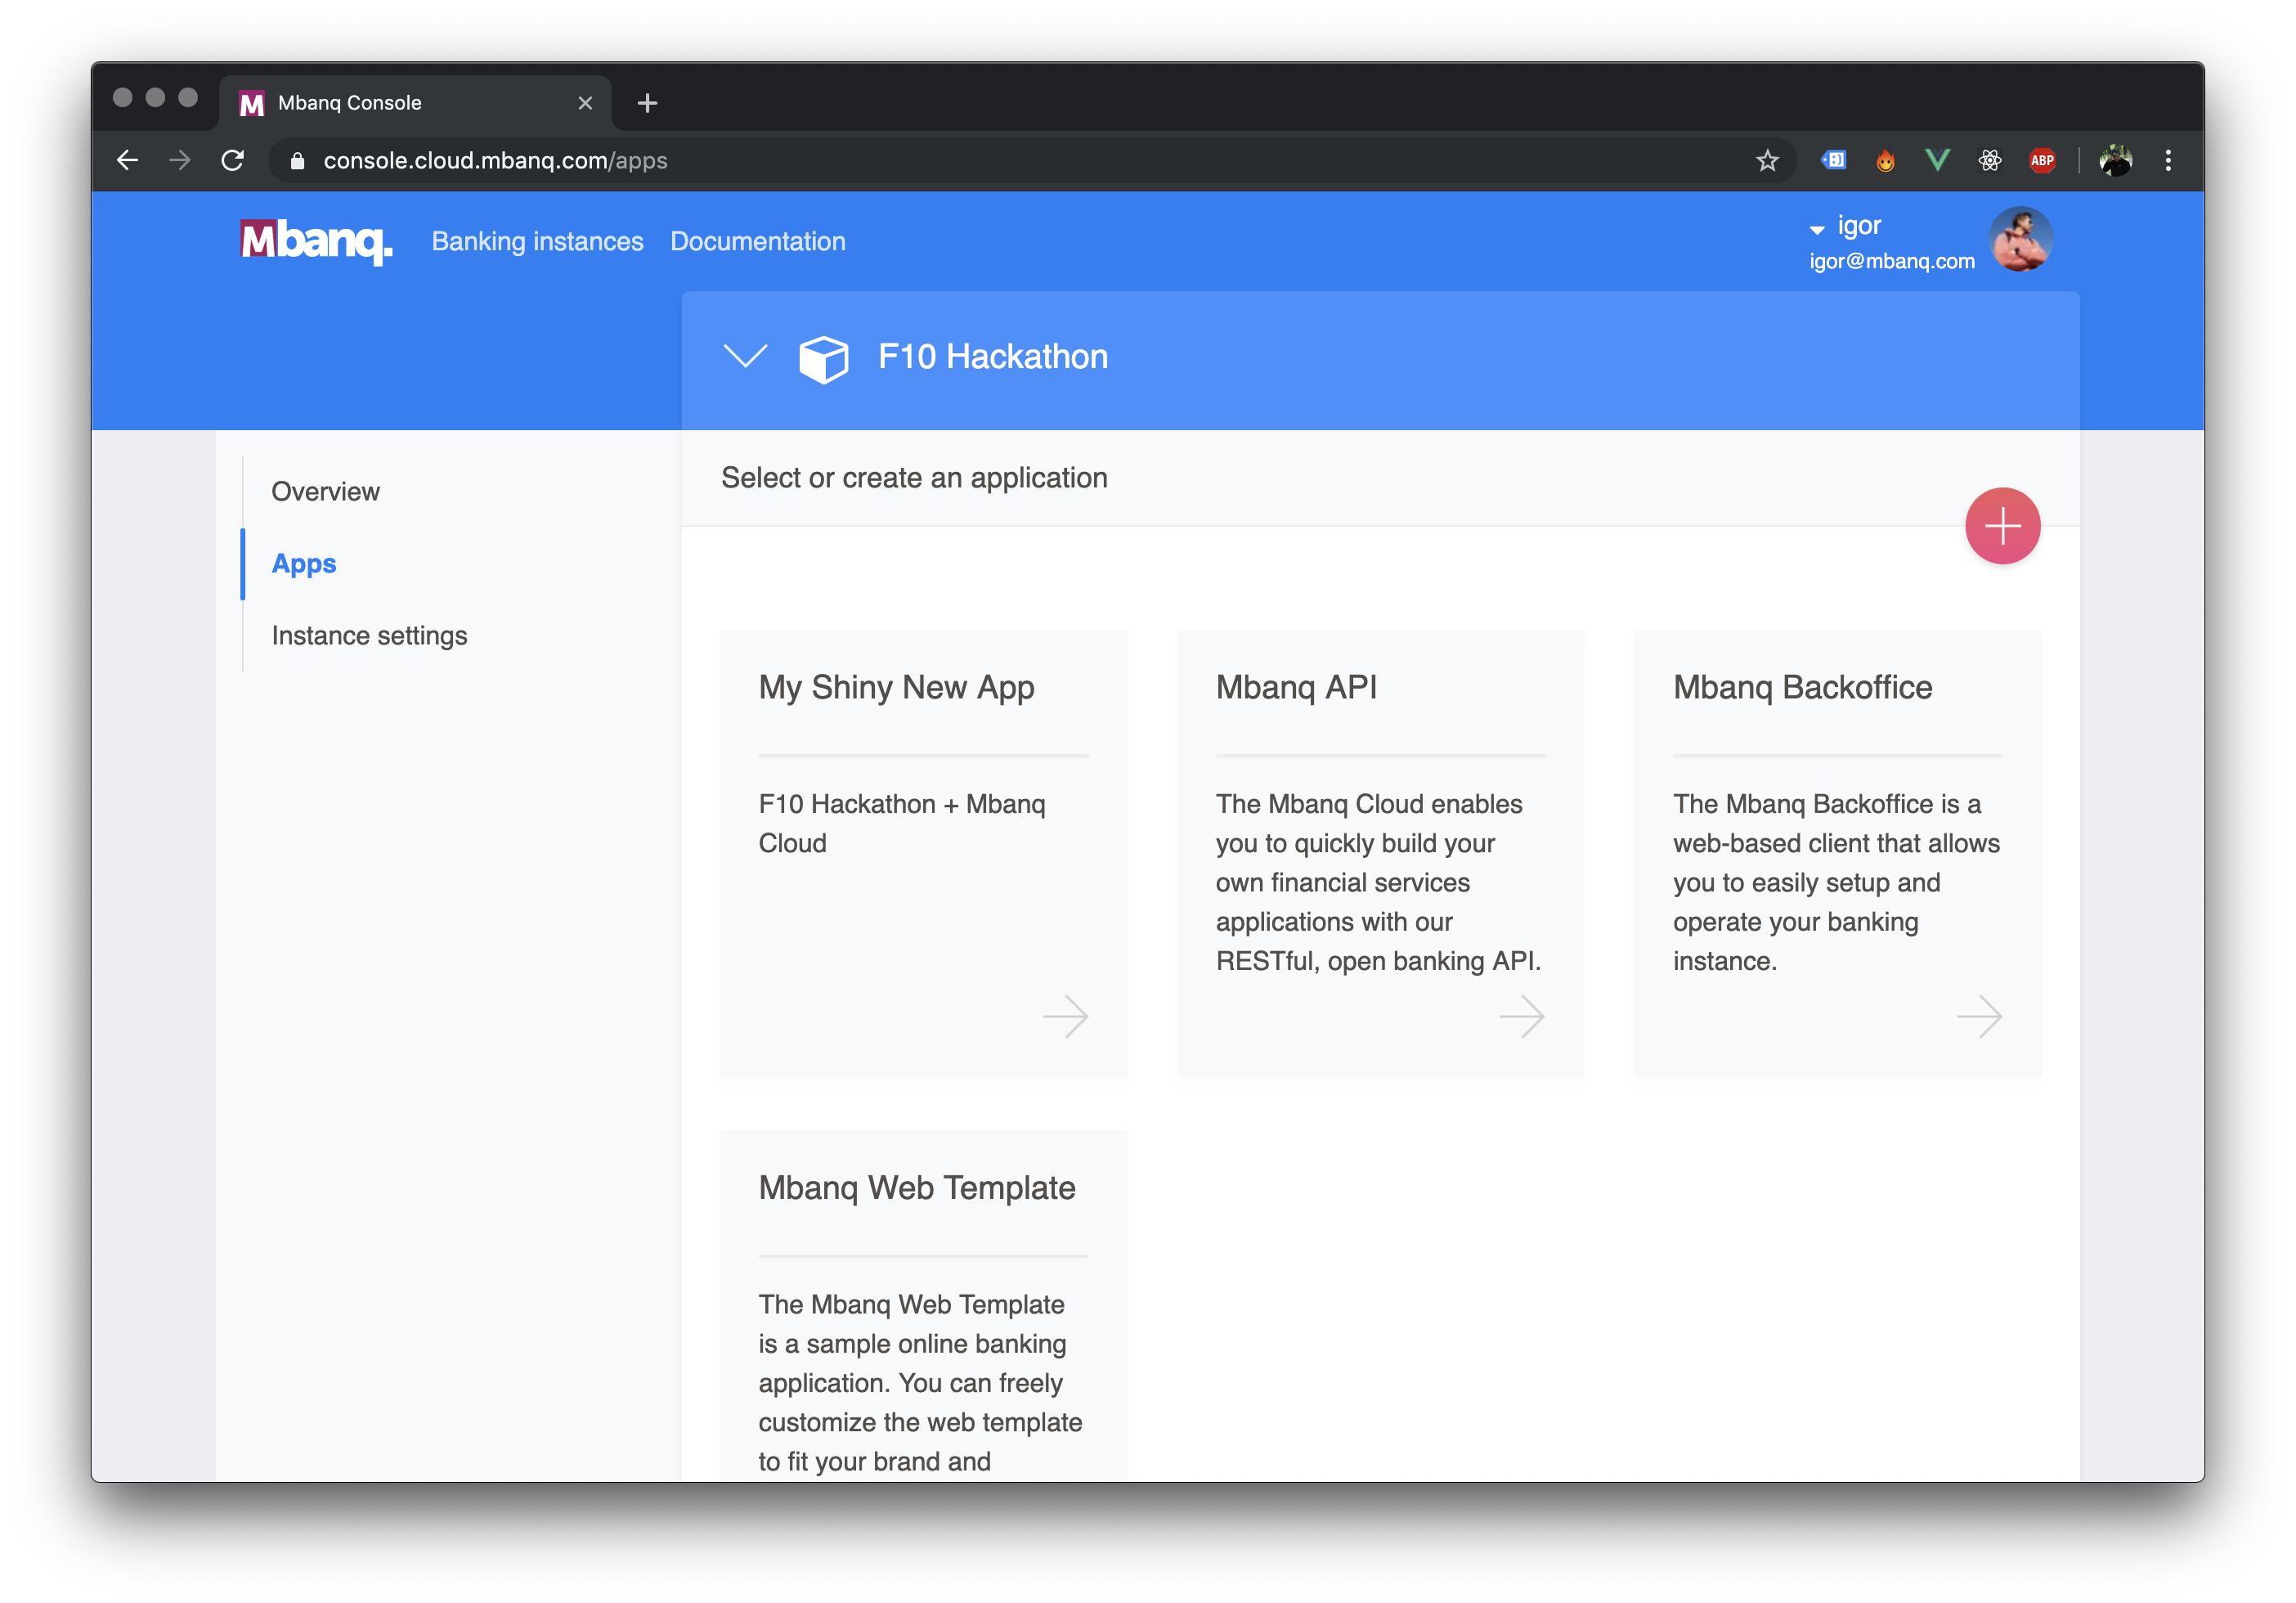
- Fill out the form and create your App
Step 3: Check out the API Docs
Now you have all the data you need to start making API Calls:
Tenant Identifier- this is the identifier of the core banking instance you created

client_idandclient_secretof the App you just created

As the next step you can start checking out the API Docs and making calls to the Mbanq Cloud API
Bonus
We prepared even more goodies for you to get you started.
If you're planning to build a js based frontend application to showcase your solution, you can use either the mbanq-api-client - API client for the frontend or the mbanq-hackathon-template
mbanq-api-client
Intended to be used to handle authentication and calls to the Mbanq API in js based frontend applications.
This API client is used in the mbanq-hackathon-template
This package was created for the hackathon and is not intended to be used in production.
Create an API client
Mbanq API client is very use to use.
Firs you have to add it to your application:
npm i -S Mbanq/mbanq-api-client
Before you can make calls to the self-service API, you have to initialize a new API client and authenticate yourself.
To create the API client you have to do the following:
const Mbanq = require('@mbanq/api')

const Client = new Mbanq({
  baseURL: 'https://api.cloud.mbanq.com',
  tenantId: 'your-tenant-identifier',
  clientId: 'your-client-identifier',
  clientSecret: 'your-client-secret'
})
baseURL: default setting points to Mbanq's evaluation evironmenthttps://api.cloud.mbanq.com. If you work with the evaluation environment you don't have to do anythingtenantId: Tenant identifier of your core banking instance that you created in theconsoleapplication e.g. Mbanq Cloud ConsoleclientId: Client identifier of the App you created for the API useclientSecret: Client secret of the App you created for the API use
Authenticate yourself
Once you created an API client, you have to authenticate yourself before you
start making calls to the API.
To authenticate yourself you have to call Client.auth() function with js
object that contains your username and password - see example below.
Client.auth({ username: 'web1', password: 'password' })
After the successful Client.auth() call, you should have the API tokens in the localStorage of your browser and you can start calling the API.
Calling the API
The mbanq-api-client offers you an easy way of making calls to Mbanq API. It
offers a very limited set of functionality and is only intended to be used for
small MVPs.
Once you created the Mbanq APi Client with the use of your tenantId,
clientId and clientSecret and authenticated yourself by running
Client.auth(credentials) you can start making calls to the api:
const api = Client.api()

// if you wanna do it right
// you should use a `try` and `catch` block

const yourFunction = async () => {
  try {
    const user = await api.user()
    const clients = await api.clients()
    const firstClientsAccounts = await api.accounts(clients.pageItems[0].id)
  } catch (error) {
    return error
  }
}
Supported API Calls
Since the mbanq-api-client was created just for the hackathon, it has
a relatively limited functionality.
Following API calls are currently supported:
user()- to get the user detailsclients(id)- to get allclientsof auseror aclientwith a particularidaccounts(clientId)- to get all theaccountsof a certainclienttransferTemplates()- to get the accounts atransfercan be createdfromandtocreateTransfer(transfer)- to create a 3rd party transfer (to another client of the same bank)transactions(clientId)- to get the savings account transactions for a certain client
Creating a transfer
Before you create a transfer you can check which accounts you can send money to, by calling api.transferTemplates().
Once you know the accounts that are eligible for money transfers you can call api.createTransfer(transfer) where transfer object has to have the following data:
  const transfer = {
    fromOfficeId: 1,
    fromClientId: 11,
    fromAccountType: 2,
    fromAccountId: 11,
    toOfficeId: 1,
    toClientId: 12,
    toAccountType: 2,
    toAccountId: 12,
    dateFormat: 'dd MMMM yyyy',
    locale: 'en',
    transferDate: '4 September 2019',
    transferAmount: '1.00',
    transferDescription: 'Subject of the transfer'
  }

  const sendMoney = async (transfer) => {
  try {
    return await api.createTransfer(transfer)
  } catch (error) {
    return error
  }
}
Report a problem
Whenever you experience a problem with this template or the mbanq-api-client
mbanq-hackathon-template
This Vue.js based template should help you to get started working with Mbanq API.
This template uses the mbanq-api-client a js package we created for this hackathon. It gives you an easy way to use Mbanq API.
In order to use this template with your own core banking instance you have to
initialize the Mbanq API Client with your:
tenantIdclientIdclientSecret
How do I start?
- Clone the repo
- Run
npm install(ornpm i) - Head over to https://labs.mbanq.io/hackathon and follow the steps to create your Core Banking Instance and the App for the API access
-
Open
.envin your favorite text editor and add your:tenantIdclientIdclientSecret
- Start the frontend App with
npm start -
Use following credentials to login:
username: web1,password: passwordusername: web2,password: password
Please note
It only gives you a limited set of functionality - you can use it to get started. If you feel that you need more functionality, you can always fall back to the Mbanq API.
If you would like to use the mbanq-api-client in your own frontend project
you can install it with npm:
npm i -S Mbanq/mbanq-api-client
Report a problem
Whenever you experience a problem with this template or the mbanq-api-client
Alternatively, please, use the Telegram Group for any questions or suggestions: Join Our Group